Curious about the inner workings of your toilet? Delve into the world of toilet repairs with this beginner’s guide. From leaky seals to clogged drains, understanding the different types of toilet repairs is essential for any homeowner. Gain insight into common issues and learn how to troubleshoot like a pro. This comprehensive overview will equip you with the knowledge needed to tackle minor repairs and know when it’s time to call in the experts. Say goodbye to plumbing woes and hello to a smoothly running bathroom!
Table of Contents
ToggleUnderstanding How Toilets Work
Chain Lifting
To understand how toilets work, the chain lifting the flapper during flushing is crucial. When you press the flush handle, the chain lifts the flapper, allowing water to flow from the tank into the bowl.
The chain’s movement is what initiates the flushing process in a toilet. As the flapper is lifted, it opens up a pathway for water to rush down into the bowl and carry away waste.
Water Flow Process
The process of water flowing from the tank to the bowl is straightforward. Once the flapper is lifted, gravity pulls the water from the tank down into the bowl through small openings located under the rim.
This flow of water creates a strong force that pushes waste out of the bowl and into the sewer system. It’s essential for these openings to be clear and free from any blockages for efficient flushing.
Tank Refilling Mechanism
After a flush, the tank refills to prepare for the next use. A fill valve controls this process by letting water enter through a supply line connected to your home’s plumbing system.
As the tank refills, it reaches a predetermined level set by an adjustable float. Once this level is reached, the fill valve stops letting in water, ensuring that there’s always enough water ready for the next flush.
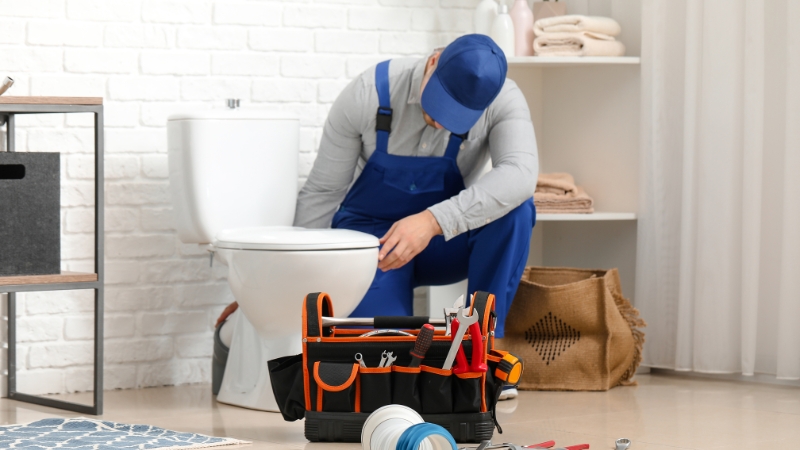
Preparing for Toilet Repairs
Safety Precautions
When starting toilet repairs, prioritize safety. Turn off the water supply by shutting the valve near the base of the toilet. Use gloves to protect your hands from germs and sharp edges.
Always wear eye protection when working on toilet problems to prevent any debris or contaminants from getting into your eyes. Ensure proper ventilation in the bathroom area to avoid inhaling harmful fumes.
Necessary Tools
Gather essential tools before beginning any toilet repairs. You may need a wrench, plunger, screwdriver, and adjustable pliers. These tools will help you navigate through various toilet parts with ease.
Keep a bucket handy to collect excess water when disconnecting components like the tube or overflow tube. This prevents spills and keeps your work area clean and dry throughout the repair process.
Troubleshooting Common Issues
Start by identifying the root cause of the problem before attempting any toilet repairs. If you notice water continuously running into the bowl, it could be due to a faulty flapper or fill valve.
To check for leaks, add a few drops of food coloring into the tank and observe if it seeps into the bowl without flushing. This simple test can pinpoint leaks that may go unnoticed but contribute to water wastage over time.
Seeking Professional Help
For complex issues beyond basic toilet handle adjustments or seat replacements, consider reaching out to a licensed plumber. They have the expertise to tackle intricate problems efficiently while adhering to local codes and regulations.
Contacting a professional ensures that intricate tasks involving connectors and fasteners are handled with precision. Their experience in handling various toilet repairs guarantees a long-lasting and effective solution for your plumbing needs.
Fixing Constant Running Issues
Checking Flapper
To address constant running issues, start by checking the flapper for any signs of wear or damage. This rubber component controls water flow and may need replacement if it’s not sealing properly.
Replacing Flapper
If the flapper appears worn out or cracked, consider replacing it with a new one. This simple fix can often resolve running problems and improve the toilet’s efficiency.
Cleaning Fill Valve
To tackle a non-emptying tank, focus on the fill valve. Clean any dirt or sediment buildup that could be affecting its performance. If cleaning doesn’t work, replacing the fill valve might be necessary.
Replacing Fill Valve
When cleaning doesn’t solve the issue, replacing the fill valve is the next step. A faulty fill valve can lead to continuous water flow, resulting in a constantly running toilet.
Impact of Debris
Debris accumulation in the fill valve’s shut–off mechanism can prevent it from closing properly, leading to continuous water flow. Regular maintenance can help prevent this issue.
Sealing Leaks Effectively
Tightening Connections
To tighten the supply line connection, turn off the water supply, use a wrench to secure the nut, and check for any remaining leaks.
Securing Tank Bolts
When tightening bolts securing the tank to the bowl, ensure they are snug but not over-tightened to prevent cracking.
Inspecting and Replacing Tanks
Inspect the tank regularly for cracks. If any are found, drain the tank, disconnect it from the bowl, and replace it promptly.
Resolving Flush Problems
Water Supply Valve
To tackle flush problems, begin by locating the water supply valve behind the toilet. Turn it off before troubleshooting.
Adjusting the flush handle can often resolve minor issues. Ensure it is properly connected to the lift chain.
Lift Chain and Water Level
Check the lift chain’s length and adjust if necessary for smooth flushing. Ensure it has minimal slack.
To optimize flushing, adjust the water level in the tank. It should be below the overflow tube to prevent overflowing.
Importance of Flapper
The flapper is crucial for sealing the flush valve opening. A deteriorated flapper can cause continuous running water issues.
Pros:
- Easy DIY fixes for common flush problems.
- Cost-effective solutions compared to professional repairs.
Cons:
- Requires occasional maintenance to prevent future issues.
- Complex problems may need expert intervention for proper resolution.
- Check water supply valve behind toilet
- Adjust flush handle, lift chain, and water level
- Emphasize importance of a good flapper seal
Solutions for Slow Filling
Lubricate Seat Hinges
To address noisy lids, begin by applying lubricant to the seat hinges. This simple step can significantly reduce the noise.
Consider using a silicone–based lubricant as it is long-lasting and effective in quieting down the movement of the seat.
Replace Seat Hinges
If lubrication does not solve the issue, you may need to replace the seat hinges. This process involves unscrewing the old hinges and attaching new ones securely.
Ensure that the new seat hinges are compatible with your toilet model to avoid any installation issues.
Upgrading to Slow-Close Lid
For a more permanent solution to noisy lids, consider upgrading to a slow-close lid. This innovative feature prevents sudden slamming, providing a quieter operation.
Slow-close lids are designed with special hinges that control the closing speed, offering a gentle and silent closure every time.
Quieting Noisy Seats
Lubricating Hinges
To address noisy toilet seat hinges, lubrication is key. Start by cleaning the hinge area thoroughly. Apply a silicone-based lubricant to the hinges, ensuring even coverage. Test the seat to check for noise reduction.
Consider repeating this process every few months to maintain smooth operation and reduce noise levels over time.
Upgrading to Slow-Close Lid
An effective way to minimize noise from toilet seats is by upgrading to a slow–close lid. These lids prevent slamming, offering a quieter experience in the bathroom. They are easy to install and available for most toilet models.
Benefits of slow-close lids include noise reduction, preventing wear and tear on the seat, and enhanced safety for children.
Handling Cracked Seats
Adjusting Handle Mounting Nut
To address cracked toilet seats, it’s crucial to check the handle mounting nut inside the tank. Start by locating the nut on the inside of the tank, typically at the top.
Loosen or tighten the nut using a wrench, depending on whether your toilet handle feels loose or tight. Ensure it’s secure but not overly tightened to prevent further damage.
Importance of Proper Adjustment
Proper adjustment of the handle mounting nut is essential for maintaining a functional toilet handle. A loose handle can lead to flushing issues, while an overly tight one might cause cracks over time.
Pros:
- Prevents further damage to the toilet seat.
- Ensures smooth and efficient flushing.
Cons:
- Over-tightening can cause cracks.
- Incorrect adjustment may lead to frequent repairs.
Adjusting Water Levels
Checking Levels
To ensure optimal toilet performance, it’s crucial to monitor and adjust the water level. Start by inspecting the water level in the tank; it should be about an inch below the overflow tube.
Adjusting Mechanism
To adjust the water level, locate the float mechanism. This component controls the water flow by rising and falling with the water level.
Simple Steps
To increase or decrease the water level, locate the adjustment screw on the float mechanism. Turn this screw clockwise to raise the water level and counterclockwise to lower it.
Impact on Functionality
Maintaining the correct water level is essential for proper toilet function. If the level is too low, you may experience weak flushes, while a high level can lead to constant running and wasted water.
Dealing with Hard Water
In areas with hard water, mineral deposits can accumulate in the tank over time. These deposits can interfere with the float mechanism’s operation, causing issues with water flow.
Preventive Measures
Regularly cleaning your toilet tank can help prevent mineral buildup and ensure smooth operation of the float mechanism. Consider using vinegar or a commercial cleaner to dissolve any deposits.
Summary
You’ve now learned the basics of toilet repairs, from understanding how toilets work to handling various common issues like leaks, flush problems, and noisy seats. By following the steps outlined in each section, you can confidently tackle these repairs on your own and save money on hiring a professional. Remember to always prepare adequately before starting any repair task and to follow safety precautions to avoid accidents. With the knowledge gained from this guide, you can maintain your toilet’s functionality efficiently and address any problems that may arise promptly.
Take charge of your toilet maintenance by applying the tips provided in this guide. Regular upkeep and timely repairs will ensure that your toilet functions smoothly, saving you from potential costly repairs in the future. Start implementing these solutions today to keep your toilet in top condition for years to come.
Experience Excellence in Toilet Repair with Garcia Plumbing and Home Restoration!
We understand the frustrations homeowners face when dealing with toilet issues. Our dedicated team of licensed experts leads the way in providing exceptional toilet repair solutions that ensure reliability and efficiency.
Beyond just toilet repairs, Garcia Plumbing and Home Restoration offers comprehensive home maintenance solutions. Our reputation in Contra Costa County is built on unwavering quality, unmatched expertise, and the trust of numerous satisfied clients. Don’t compromise when it comes to your home’s functionality and cleanliness. Contact us today for outstanding toilet repair service and embrace a worry-free plumbing future!