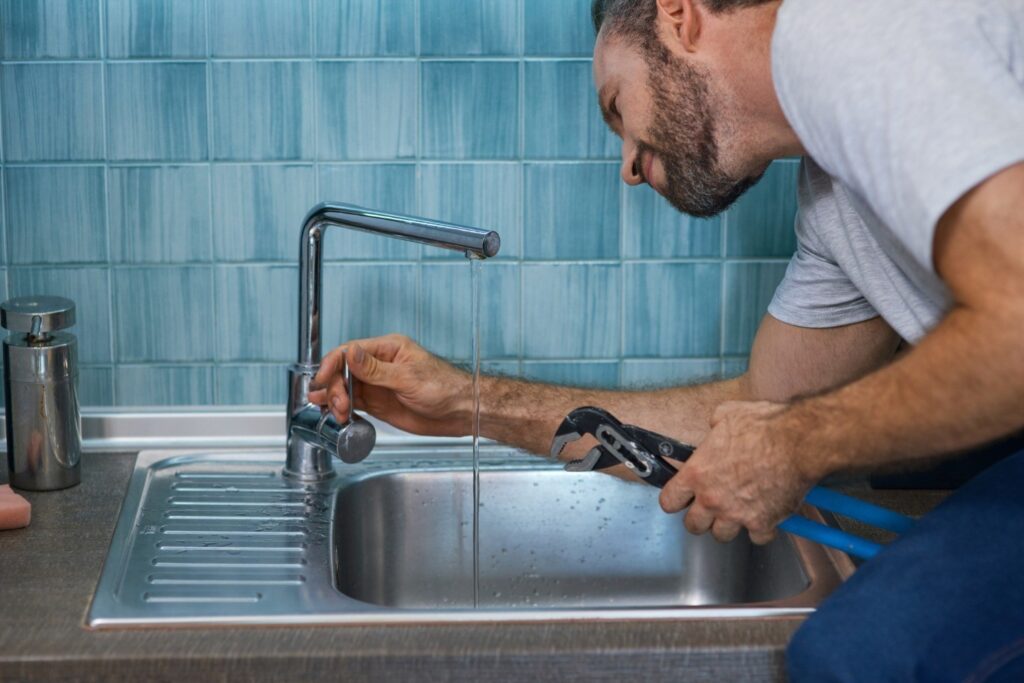
Faucet leaks are a common household issue that can lead to wasted water, increased utility bills, and even water damage if left unchecked. Understanding the causes of faucet leaks and knowing how to repair them is essential for homeowners and property managers alike. This comprehensive guide delves into the top causes of faucet leaks and provides detailed solutions to address and prevent these issues.
Table of Contents
ToggleIntroduction to Faucet Leaks
Faucet leaks might seem like a minor inconvenience, but they can have significant repercussions. According to the Environmental Protection Agency (EPA), household leaks can waste nearly one trillion gallons of water annually nationwide. Fixing these leaks can save homeowners about 10% on their water bills. This article explores the anatomy of a faucet, common causes of leaks, and step-by-step repair methods.
Anatomy of a Faucet
To understand faucet leaks, it’s important to know how a faucet works. The basic components of a standard faucet include:
- Handle: The part you turn to control the water flow.
- Valve: The mechanism that opens and closes to regulate water flow.
- Spout: The part where water comes out.
- Aerator: A screen that fits over the end of the spout to reduce splashing and save water.
- Washer: A flat rubber or silicone ring that helps create a watertight seal.
- O-ring: A small ring that helps seal the handle.
- Cartridge or Ball: Used in some faucet types to control water flow and temperature.
Common Causes of Faucet Leaks
1. Worn-Out Washers
Description: Washers are among the most common components that can cause faucet leaks. They sit against the valve seat, and every time the faucet is used, the washer is pressed into the valve seat. This constant friction wears out the washer over time, leading to leaks.
Symptoms: Dripping from the spout, especially when the faucet is turned off.
Repair Solution:
- Turn off the water supply to the faucet.
- Remove the faucet handle.
- Remove the valve stem assembly.
- Replace the old washer with a new one of the same size.
- Reassemble the faucet and turn on the water supply.
2. Worn-Out O-Rings
Description: O-rings are used to create a seal in various parts of the faucet, especially around the handle. These rings can wear out or become damaged over time, leading to leaks around the base of the handle.
Symptoms: Water leaking from the handle area.
Repair Solution:
- Turn off the water supply to the faucet.
- Remove the handle.
- Inspect the O-ring and replace it if it shows signs of wear or damage.
- Reassemble the faucet and turn on the water supply.
3. Corroded Valve Seat
Description: The valve seat connects the faucet to the spout. Over time, water sediments can cause the valve seat to corrode, leading to leaks around the spout area.
Symptoms: Water leaking from the spout base.
Repair Solution:
- Turn off the water supply to the faucet.
- Remove the spout and valve seat.
- Use a valve seat wrench to remove the old valve seat.
- Install a new valve seat and reassemble the faucet.
4. Loose Parts
Description: Over time, parts of the faucet can become loose due to regular use. This can cause leaks around various parts of the faucet.
Symptoms: Water leaking from different parts of the faucet, such as the handle or spout.
Repair Solution:
- Turn off the water supply to the faucet.
- Tighten any loose parts with the appropriate tools.
- Replace any parts that are worn out or damaged.
- Reassemble the faucet and turn on the water supply.
5. Worn-Out Cartridge
Description: In cartridge faucets, the cartridge can wear out over time. This is a common cause of leaks in modern faucets.
Symptoms: Dripping from the spout, difficulty in controlling water temperature or flow.
Repair Solution:
- Turn off the water supply to the faucet.
- Remove the handle and any retaining clips or nuts.
- Pull out the old cartridge.
- Install a new cartridge of the same type.
- Reassemble the faucet and turn on the water supply.
6. High Water Pressure
Description: Excessively high water pressure can cause stress on the faucet components, leading to leaks. It can also cause the faucet to drip even when it is turned off.
Symptoms: Dripping from the spout, particularly after turning off the faucet, and leaks in multiple areas.
Repair Solution:
- Check the water pressure using a water pressure gauge.
- If the pressure is too high, install a pressure reducing valve (PRV) on the main water line.
- Adjust the PRV to reduce the water pressure to a normal range (40-60 psi).
7. Faulty Installation
Description: Incorrect installation can cause leaks in various parts of the faucet. This can be due to improper sealing, loose connections, or using the wrong parts.
Symptoms: Leaks around the base, spout, or handle immediately after installation.
Repair Solution:
- Review the installation instructions and ensure all steps were followed correctly.
- Disassemble and reassemble the faucet, ensuring all parts are properly fitted and tightened.
- Use plumber’s tape to ensure a good seal on threaded connections.
8. Damaged Faucet Components
Description: Various components of the faucet, such as the spout, handles, or internal parts, can become damaged over time due to wear and tear or accidental impact.
Symptoms: Visible cracks, leaks from damaged areas, difficulty in operation.
Repair Solution:
- Identify the damaged component.
- Obtain a replacement part from the manufacturer or a hardware store.
- Follow the appropriate steps to replace the damaged part.
- Reassemble the faucet and turn on the water supply.
9. Improper Maintenance
Description: Lack of regular maintenance can lead to build-up of sediments, mineral deposits, and other issues that cause leaks.
Symptoms: Gradual decrease in water flow, difficulty in operation, leaks in various parts.
Repair Solution:
- Regularly clean the faucet components, such as the aerator and spout, to remove sediments.
- Perform periodic checks and replace worn-out parts as needed.
- Use a vinegar solution to clean and dissolve mineral deposits.
10. External Factors
Description: External factors such as changes in water chemistry, seasonal temperature changes, or pressure fluctuations in the municipal water supply can contribute to faucet leaks.
Symptoms: Unpredictable leaks, changes in water pressure, and new leaks appearing without any internal faults.
Repair Solution:
- Monitor water chemistry and pressure changes.
- Use water softeners or filtration systems if needed.
- Adjust or repair the faucet components as necessary to cope with the external factors.
Preventive Measures to Avoid Faucet Leaks
Prevention is always better than cure. Here are some preventive measures to avoid faucet leaks:
- Regular Maintenance: Regularly inspect and maintain your faucet components to ensure they are in good working condition.
- Use Quality Parts: Always use high-quality replacement parts to ensure longevity and reliability.
- Proper Installation: Ensure that faucets are installed correctly according to the manufacturer’s instructions.
- Monitor Water Pressure: Regularly check and maintain the water pressure within the recommended range.
- Water Treatment: Use water softeners or filtration systems to reduce the impact of hard water on your faucet components.
Tools and Materials Needed for Faucet Repairs
Before you start repairing your faucet, gather the necessary tools and materials:
- Adjustable wrench
- Screwdriver set (Phillips and flathead)
- Plumber’s tape
- Replacement washers, O-rings, cartridges, and other parts
- Plumber’s grease
- Valve seat wrench (if needed)
- Cleaning supplies (vinegar solution, brush)
Step-by-Step Repair Guides for Common Faucet Types
1. Compression Faucet Repair
Description: Compression faucets have separate hot and cold water handles. They work by compressing a rubber washer to stop the water flow.
Steps:
- Turn off the water supply.
- Remove the handle using a screwdriver.
- Unscrew the packing nut with an adjustable wrench.
- Remove the valve stem and inspect the washer.
- Replace the washer if it is worn out.
- Reassemble the faucet and turn on the water supply.
2. Ball Faucet Repair
Description: Ball faucets have a single handle that controls both the temperature and flow of water. They use a ball valve to regulate water flow.
Steps:
- Turn off the water supply.
- Remove the handle set screw and lift off the handle.
- Remove the cap and collar.
- Use a special tool to remove the ball, cam, and packing.
- Inspect and replace any worn-out parts.
- Reassemble the faucet and turn on the water supply.
3. Cartridge Faucet Repair
Description: Cartridge faucets have a cartridge mechanism that controls water flow. They can have either a single handle or separate handles for hot and cold water.
Steps:
- Turn off the water supply.
- Remove the handle screw and lift off the handle.
- Remove the retaining clip or nut that holds the cartridge in place.
- Pull out the cartridge and inspect it.
- Replace the cartridge if it is worn out.
- Reassemble the faucet and turn on the water supply.
4. Disk Faucet Repair
Description: Disk faucets have a single lever that controls the flow of water through two ceramic disks.
Steps:
- Turn off the water supply.
- Remove the handle using a screwdriver.
- Lift off the cap and remove the disk cylinder.
- Inspect the seals and disks for wear or damage.
- Replace any worn-out parts.
- Reassemble the faucet and turn on the water supply.
Conclusion
Faucet leaks are a common household issue, but they can be effectively managed with the right knowledge and tools. By understanding the causes of faucet leaks and following the detailed repair steps provided in this guide, homeowners can save water, reduce utility bills, and prevent potential water damage. Regular maintenance and using quality parts are key to ensuring the longevity and reliability of your faucets.
By addressing faucet leaks promptly and effectively, you can ensure a smooth and efficient water supply system in your home, contributing to overall water conservation and cost savings. Whether you are dealing with a simple washer replacement or a more complex cartridge change, this comprehensive guide equips you with the knowledge to tackle faucet leaks confidently.
Experience Excellence in Faucet Repair with Garcia Plumbing and Home Restoration!
We understand the frustrations homeowners face when dealing with faulty faucets. Our dedicated team of licensed experts leads the way in providing exceptional faucet repair solutions that ensure reliability and efficiency.
Beyond just faucet repairs, Garcia Plumbing and Home Restoration offers comprehensive home maintenance solutions. Our reputation in Contra Costa County is built on unwavering quality, unmatched expertise, and the trust of numerous satisfied clients. Don’t compromise when it comes to your home’s functionality and cleanliness. Contact us today for outstanding faucet repair service and embrace a worry-free plumbing future!